Design • 26 February, 2021 • 10 min read
How To Make Paper Pinwheel Decorations
Learn how to make paper pinwheel decorations in six easy steps. Perfect for parties or just to liven up an empty wall, create these beautiful paper rosettes with paper, scissors and tape. Watch the video, or follow our fast and simple tutorial below, plus find out how to style this trendy wall decoration!
By Edvin Brobeck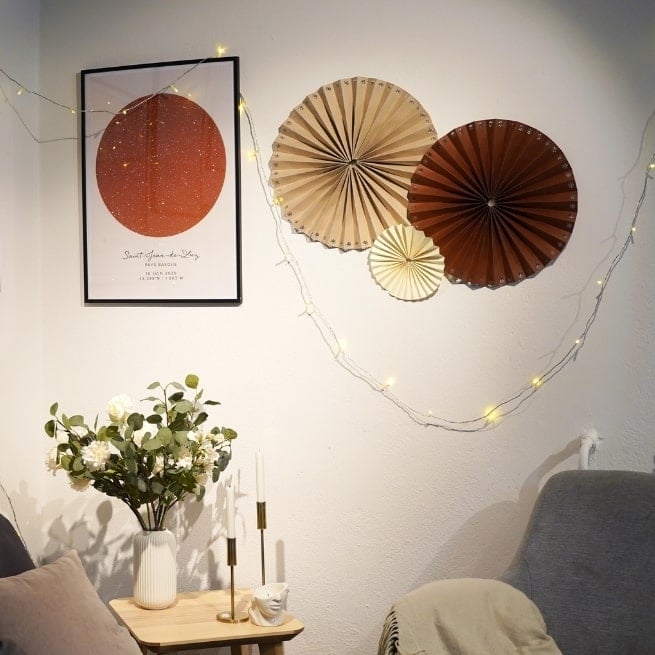
SUPPLIES
You’ll need:
Thick craft paper in a few colors of your choice
A hole punch
Double-sided tape
Scissors
A ruler
TUTORIAL
How To Make Paper Pinwheel Decorations
Follow the simple 6 step tutorial below to create beautiful paper fan decorations. Unlike other tutorials, this one is easy – no glue gun required! Watch the video, or follow the pictorial below.
STEP ONE
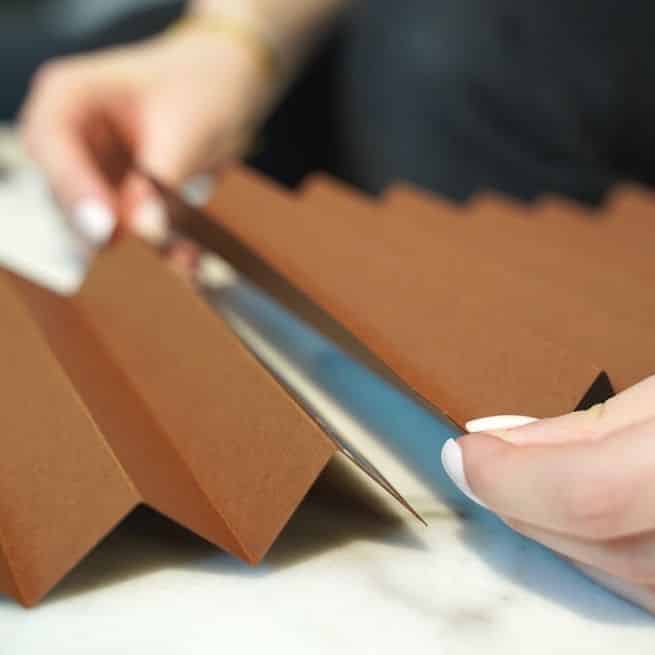
Cut and Score Paper
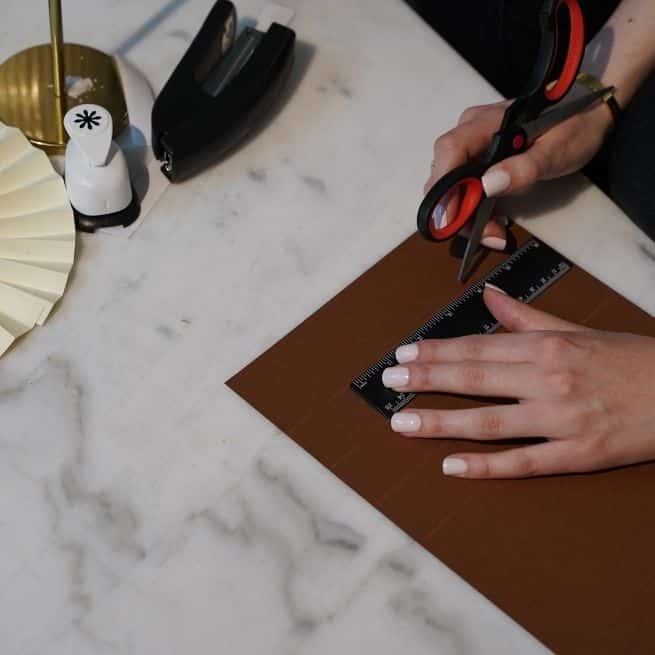
Start by grabbing your piece of paper. We’re going to make a large pinwheel, but depending on the size you would like yours to be, you can cut it down.
Make sure you have equally spaced folds running down the whole width of your paper. Scoring the paper with scissors and a ruler makes this much easier.
STEP TWO
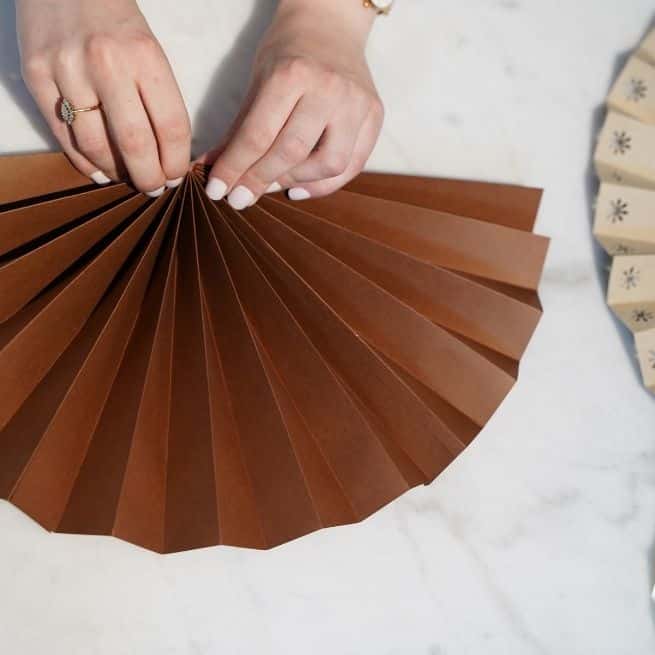
Fold Paper
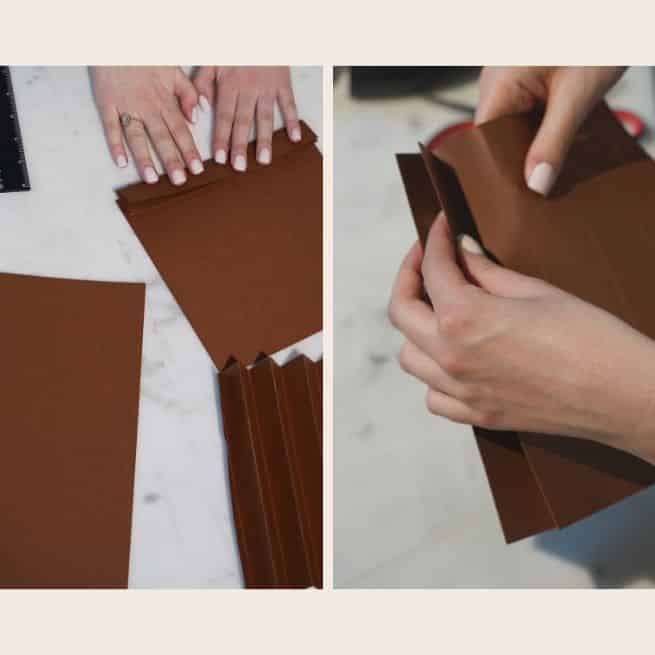
Start folding! You can also use the ruler to press down on the folds sure the folds are sharp and tight.
It’s super important to make sure your folds are going in a zig-zag formation, accordion style, as though you were folding a paper fan.
STEP THREE
Apply Tape
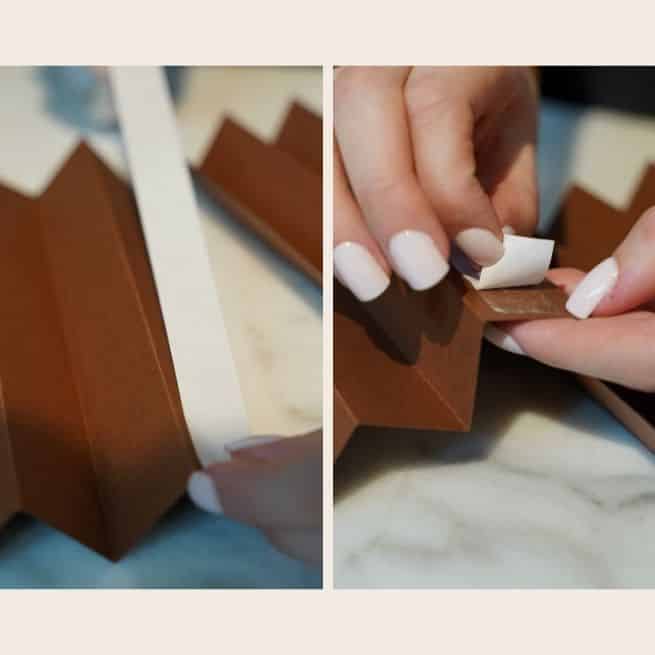
Apply the double sided tape carefully and start to assemble the pieces. Make sure the different pieces of paper are securely and evenly stuck.
Repeat this process of cutting, folding and applying tape up to four times, until you have the size of pinwheel that you want.
STEP FOUR
Attach Pieces
Attach your paper rosette pieces nice and tightly with the double sided tape. Make sure the different pieces match in size, and that the folds go in the same direction.
STEP FIVE
Finish Up
Unfold the pieces and attach the remaining sides so that you end up with a paper fan shape. Like step four, the important thing here is to make sure that the direction of the final pieces match, so that the folds flow together!
STEP SIX
Add Extras
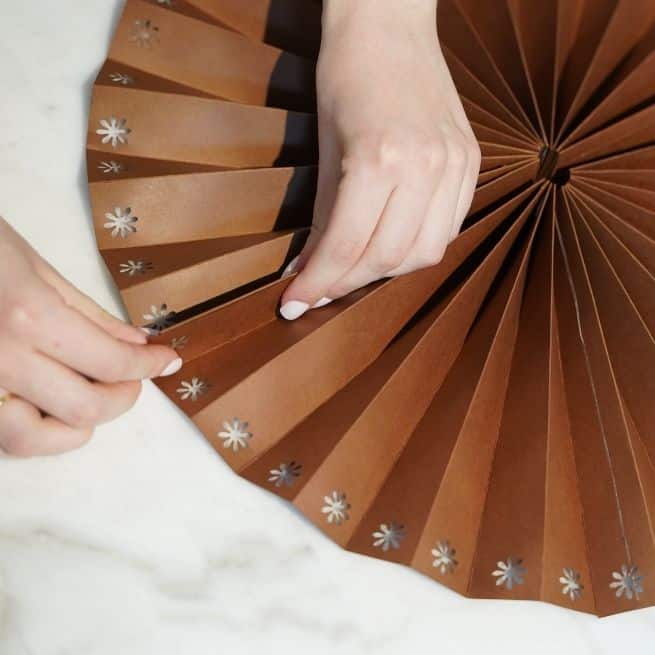
And there you have it! Your pinwheel is ready to become a wall decoration. You can add more things to the rosette at this point, like stickers or even a piece of string for easy hanging.
Love the rustic Scandi look as much as we do? Here you also have the option to grab your hole punch and make holes in the edge of each fold. This is going to create a really pretty pattern!
How To Style DIY Paper Pinwheels Rosettes
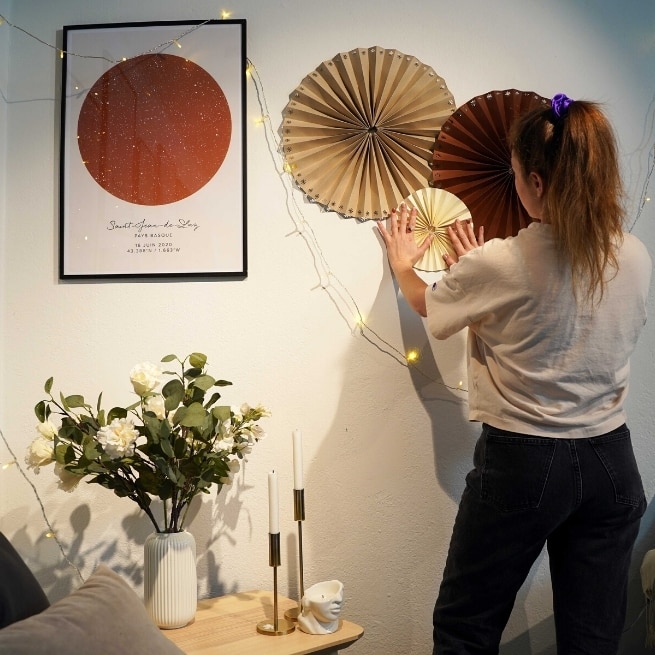
Add a touch of trendy minimalism to any room with these DIY paper pinwheels. Here are some ideas for styling them, once you’ve made a few and got the hang of it!
- Gallery Walls – Spice up your gallery or print wall with these beautiful DIY paper rosettes. Create them in matching or complementary tones, and arrange asymmetrically to add a unique twist to a tired wall.
- Nursery Decor – Create hanging pinwheels in different sizes and shapes and hang them above your little one’s crib. It’s the easiest DIY mobile! They’ll love to watch the pinwheels gently turn, especially if you choose their favorite color!
- Kids Parties – These paper pinwheel decorations are fun and festive. How about making a bunch in different bright colors to hang as a garland, to bring a touch of fun to your kids’ special day? This is a more sustainable option than buying a bunch of new decorations that you’ll probably end up discarding, too!
- Create a backdrop – Imagine a whole wall full of paper pinwheels to create a beautiful backdrop to take photos in front of. Our tutorial can help you make that happen in just a few folds. Grab your friends or family and get them all involved!


")


